

Key Takeaways
Why Routine Fluid Checks Matter
Your vehicle depends on a network of specialized fluids to protect its engine, enable safe braking, and maintain comfortable control. When any of these drop too low - or degrade in quality - the consequences can range from reduced performance to costly mechanical failures. The good news: checking most fluids takes under 20 minutes and requires no specialized tools.
Many drivers only notice a fluid problem after a warning light illuminates. But by then, some damage may already be underway. Building a habit of periodic visual checks puts you ahead of potential problems. For context on which dashboard alerts demand immediate attention, see our guide to dashboard warning lights.
If you drive a high-mileage vehicle, routine fluid checks become even more important. Keeping a high-mileage car on the road reliably often comes down to catching small issues - like a slow fluid leak - before they escalate.
Clean lint-free rags or paper towels
Used to wipe dipsticks clean before reading fluid level and condition.
Vehicle owner's manual
Identifies correct fluid specifications, reservoir locations, and service intervals for your specific vehicle.
Flashlight or phone torch
Helps illuminate the engine bay and reservoir markings in low-light conditions.
Disposable gloves
Protects hands from contact with engine oil, brake fluid, and coolant, which can irritate skin.
What You Need Before You Start
Before opening the hood, gather a few basic items and take note of the safety rules that apply to any fluid inspection. Working on a cool engine on flat ground eliminates most of the risks involved.
What you will need
Never Open the Coolant Cap When Hot
The cooling system operates under pressure. Opening the radiator cap or coolant reservoir cap on a hot engine can cause scalding fluid to eject suddenly. Always wait at least 30 minutes after driving before inspecting coolant levels. If your temperature gauge is in the red, pull over safely and call for assistance rather than opening the hood.
How to Check Each Fluid
Follow these steps in order to systematically inspect every major fluid in your vehicle. Take your time on each one - it's worth doing carefully. If any fluid appears significantly low, abnormally colored, or has an unusual odor, note it and consult a qualified mechanic before your next drive.
Mixing Fluid Types Can Cause Serious Damage
Adding the wrong fluid to a reservoir - such as brake fluid in the power steering reservoir, or the incorrect oil viscosity - can cause significant mechanical damage. Always confirm the correct fluid specification in your owner's manual before topping off. When in doubt, consult a qualified mechanic rather than guess.
Prepare the vehicle before checking any fluids
Park on a flat, level surface and turn off the engine. For most fluid checks, the vehicle should be cold or have been sitting for at least 10 minutes. Engage the parking brake, open the hood, and locate the hood support rod if your vehicle doesn't have an automatic prop. Gather your rags and owner's manual before you begin.
Check the engine oil level and condition
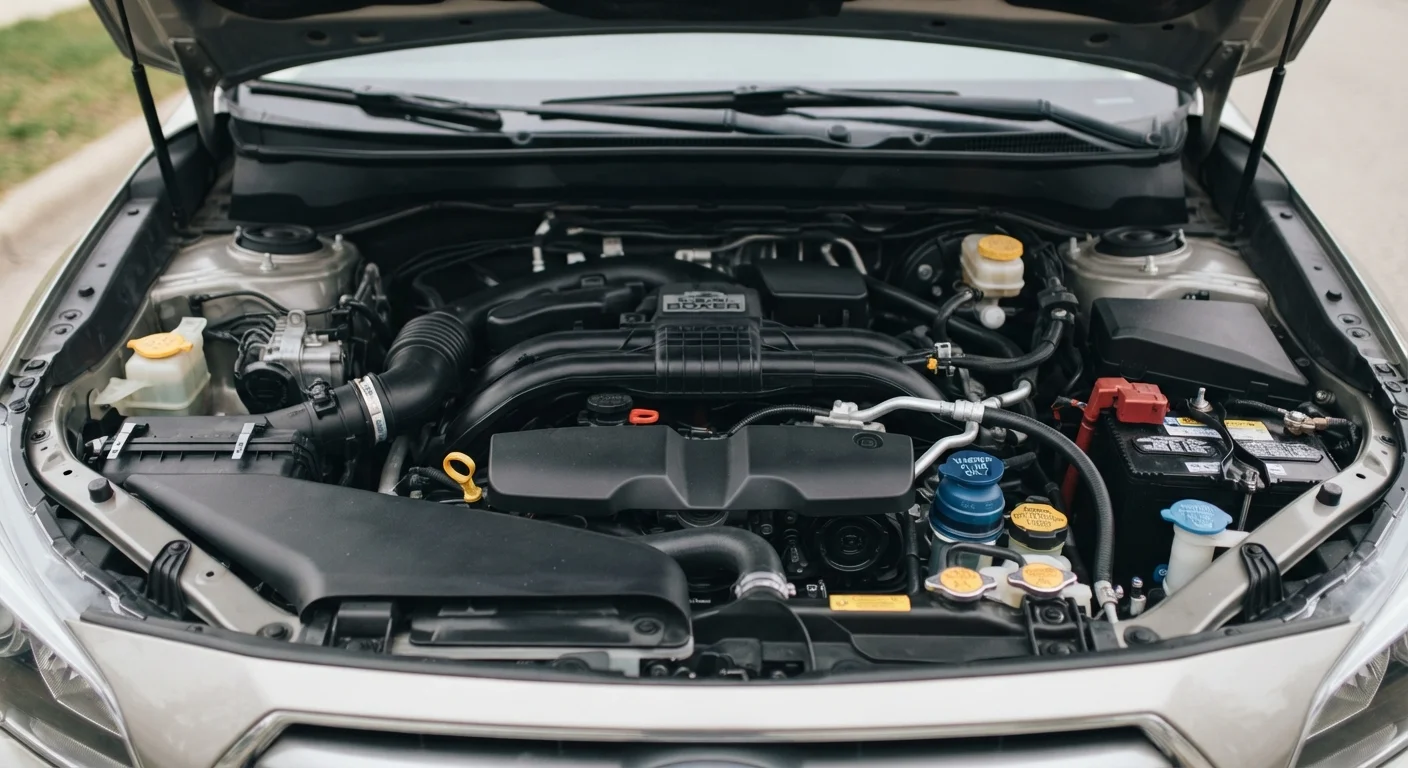
Locate the oil dipstick - typically identified by a brightly colored handle (often yellow or orange). Pull it out fully, wipe it clean with a rag, reinsert it all the way, then pull it out again. Read the oil level against the MIN and MAX markers on the dipstick. The oil should fall between those two marks. Also look at the oil's color and texture: healthy oil ranges from amber to dark brown. Oil that appears milky, foamy, or contains visible grit warrants a visit to a mechanic.
Inspect the coolant (antifreeze) level
The coolant reservoir is a translucent plastic tank, usually located near the radiator, with MIN and MAX lines visible from the outside. Do not open the cap if the engine is warm. Simply read the external level markings. The coolant should sit between MIN and MAX. Check the color as well - coolant is typically green, orange, or pink depending on the formulation used. If it appears rusty, brown, or oily, it may need to be flushed by a professional.
Check the brake fluid level
The brake fluid reservoir is typically a small, translucent plastic container mounted on top of the brake master cylinder near the back of the engine bay on the driver's side. Without removing the cap, read the level against the MIN and MAX markings on the outside of the reservoir. Brake fluid is clear to light yellow when fresh. A dark brown color indicates the fluid has aged and absorbed moisture - a condition your mechanic can address during a routine service.
A notably low brake fluid level - especially if you haven't had recent brake work - may indicate a leak in the brake system and should be inspected promptly by a qualified mechanic.
Assess power steering fluid (if applicable)
Many newer vehicles use electric power steering and have no fluid to check. If your vehicle has a hydraulic power steering system, locate its reservoir - often a small cap labeled with a steering wheel icon. Some reservoirs have a dipstick attached to the cap; others have external MIN/MAX markings. Check the level and look for a clean, red or clear fluid. Dark or foamy fluid can indicate a problem worth discussing with a mechanic.
Check transmission fluid (where accessible)
Not all vehicles allow drivers to check transmission fluid independently. Older and many rear-wheel-drive vehicles have a transmission dipstick similar to the engine oil dipstick. Use the same wipe-reinsert-read method. Healthy transmission fluid is typically red or pink and has a slightly sweet smell. Dark brown fluid or a burned odor suggests the fluid is overdue for service. Many modern vehicles have sealed transmissions - your owner's manual will indicate if this applies to yours, in which case a dealer or mechanic handles the inspection.
Top off windshield washer fluid
The windshield washer reservoir is typically the easiest to identify - look for a cap marked with a windshield and water jet symbol. Unlike other vehicle fluids, this is one you can safely top off yourself using commercially available washer fluid formulated for your climate. Avoid using plain water, which can freeze in winter and doesn't effectively cut through road grime or insects.
Interpreting What You Find and Next Steps
Consistently low fluid levels often indicate a leak or internal consumption issue - not just a need for topping off. For example, oil that disappears between changes might signal worn piston rings or valve seals. Brake fluid that repeatedly reads low may point to a hydraulic leak somewhere in the system. These findings are worth sharing with a mechanic rather than simply refilling and moving on.
It's also worth separating fact from folklore when it comes to fluid-related maintenance advice. For instance, the long-held belief that engine oil must be changed every 3,000 miles regardless of conditions isn't accurate for most modern vehicles. Car maintenance myths that could cost you money covers this and other common misconceptions worth knowing.
For a broader maintenance perspective, the maintenance tasks most drivers overlook - like transmission fluid and cabin air filters - are worth adding to your routine once fluid checks feel comfortable. And if you want to tie this into a broader pre-trip habit, pre-drive vehicle checks that take less than five minutes show how a quick once-over can catch issues before they become roadside problems.